Problem with 'Particle Romover'
|
Hi All,
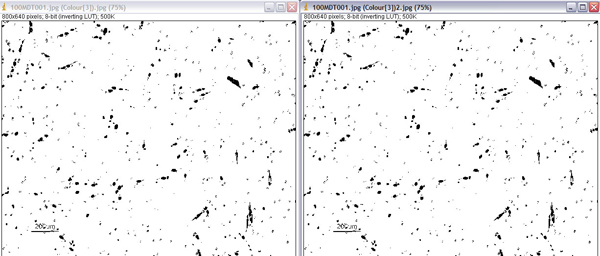
I am experiencing some problems with the Particle Remover plug-in. The final image does not appear to be cleaned from the particles. It is exactly the same of the original image. I have run a number of tests with images I already cleaned in the past using the same parameters and I was expecting to have the final image cleaned. Does someone have an idea why this happens and what to do the have the system working? Many thanks for helping simone |
|
Hi All,
Let me rephrase the problem I am facing with the 'Particle Remover' plug-in. When I set the 'Analyze Particles' window i.e. 'Size', 'Circularity', Show', etc, I am expecting to have the final image erased from the unwanted particles (i.e. those captured by the size set). I can see the removed particles in the 'Mask' or 'Eclipses' if I want them to be shown. However, I do not have the final image cleaned from the unwanted particles. Which is the one I need. Please note that I am running test images that I have already used with the 'Particle Remover' plug-in and I remember that previously everything was working fine. Is there a way to fix this problem or am I missing something? Thank you very much for helping simone |
|
Hello,
On Mar 4, 2010, at 2:17 PM, sdegan wrote: > Hi All, > > Let me rephrase the problem I am facing with the 'Particle Remover' > plug-in. > > When I set the 'Analyze Particles' window i.e. 'Size', > 'Circularity', Show', > etc, I am expecting to have the final image erased from the unwanted > particles (i.e. those captured by the size set). I can see the removed > particles in the 'Mask' or 'Eclipses' if I want them to be shown. > However, I > do not have the final image cleaned from the unwanted particles. > Which is > the one I need. > This does sound very confusing. I think you are saying that particles outside of the size range you specified using Analyze Particles are still present in the mask that it creates? You could do yourself a favor (and us, too!) by recording the menu selections you make to analyze your image. Use the Plugins > Macro > Record... option to make the recording. Be sure that you select the macro option in the record window (not a plugin or script). Then paste the contents of the recorder into an email and send it along to this list. Here's an example I just made using the steps above. run("Blobs (25K)"); run("Duplicate...", "title=blobs-1.gif"); setAutoThreshold("Default"); //run("Threshold..."); setThreshold(126, 255); run("Convert to Mask"); run("Set Measurements...", "area standard centroid center perimeter bounding shape feret's display redirect=blobs.gif decimal=3"); run("Analyze Particles...", "size=0-Infinity circularity=0.00-1.00 show=Masks display clear summarize"); Cheers, Ben > Please note that I am running test images that I have already used > with the > 'Particle Remover' plug-in and I remember that previously everything > was > working fine. > > Is there a way to fix this problem or am I missing something? > > Thank you very much for helping > > simone > -- > View this message in context: http://n2.nabble.com/Problem-with-Particle-Romover-tp4675438p4676544.html > Sent from the ImageJ mailing list archive at Nabble.com. |
|
Hi,
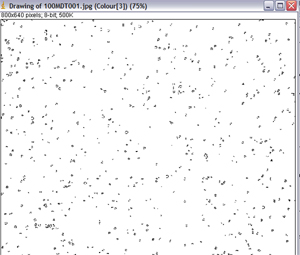
Yesterday and today I have tried several more times to run the Particles Remover plug-in and I still have the final image that looks exactly the same as the original one. Here is the recorded macro: open("C:\\...\\100MDT001.jpg"); //run("Threshold..."); setThreshold(0, 147); run("Convert to Mask"); run("Set Measurements...", "area mean min limit display redirect=[100MDT001.jpg (Colour[3])] decimal=3"); run("Particle Remover", "size=0-40 circularity=0.00-1.00 show=Ellipses clear include summarize"); selectWindow("Drawing of 100MDT001.jpg (Colour[3])"); selectWindow("100MDT001.jpg (Colour[3])"); selectWindow("100MDT001.jpg (Colour[3])2"); selectWindow("100MDT001.jpg (Colour[3])"); run("Measure"); selectWindow("100MDT001.jpg (Colour[3])2"); run("Measure"); And here are the results of the two above images (I do not know why the suffix >Colour[3])2< does not appear in row 2, the area is: 12796): 1 100MDT001.jpg (Colour[3]) 12796 255 255 255 2 100MDT001.jpg (Colour[3]) 12796 255 255 255 What am I doing wrong? The same image was tested months ago and I was able to delete the particles of smaller size with the same procedure. Thank you very much for helping simone Comparison of the 2 images:  Elipses: 
|
|
Hello again,
Perhaps you could first try verifying that the following works for you. It works for me with ImageJ 1.43r run("Particles (75K)"); run("Particle Remover", "size=0-40 circularity=0.00-1.00 show=Masks display clear record"); Running the macro above produces the Results Table, "Mask of particles.gif" and "particles.gif". Then you might check that the size range you specify actually captures the size of some of your objects. For example, you change the size range to 0-0 in the above you'll see an empty Results Table and the "Mask of particles.gif" will not be produced (since nothing gets removed). Cheers, Ben On Mar 8, 2010, at 12:12 PM, sdegan wrote: > Hi, > > Yesterday and today I have tried several more times to run the > Particles > Remover plug-in and I still have the final image that looks exactly > the same > as the original one. Here is the recorded macro: > > open("C:\\...\\100MDT001.jpg"); > //run("Threshold..."); > setThreshold(0, 147); > run("Convert to Mask"); > run("Set Measurements...", "area mean min limit display > redirect=[100MDT001.jpg (Colour[3])] decimal=3"); > run("Particle Remover", "size=0-40 circularity=0.00-1.00 > show=Ellipses clear > include summarize"); > selectWindow("Drawing of 100MDT001.jpg (Colour[3])"); > selectWindow("100MDT001.jpg (Colour[3])"); > selectWindow("100MDT001.jpg (Colour[3])2"); > selectWindow("100MDT001.jpg (Colour[3])"); > run("Measure"); > selectWindow("100MDT001.jpg (Colour[3])2"); > run("Measure"); > > > And here are the results of the two above images (I do not know why > the > suffix >Colour[3])2< does not appear in row 2, the area is: 12796): > > 1 100MDT001.jpg (Colour[3]) 12796 255 255 255 > 2 100MDT001.jpg (Colour[3]) 12796 255 255 255 > > What am I doing wrong? The same image was tested months ago and I > was able > to delete the particles of smaller size with the same procedure. > > Thank you very much for helping > > simone > > Comparison of the 2 images: > http://n2.nabble.com/file/n4696684/comparison_2.jpg > > Elipses: > http://n2.nabble.com/file/n4696684/elipses.jpg > -- > View this message in context: http://n2.nabble.com/Problem-with-Particle-Romover-tp4675438p4696684.html > Sent from the ImageJ mailing list archive at Nabble.com. |
|
Hi Ben,
I have tried all the possibilities. I can clearly see the elipses or the masks that are pick up by the Particle Remover but the final image is still the same as the original i.e. no cleaned. What I do not understand is that before updating ImageJ the same macro was working but now it is not. I really do not know what to do. I think that on possibility is try to apply with the 'Subtract' command to clean the particles of the mask image from the original image. What do you think? Thanks for your help, simone |
|
Hi Simone,
Try to see what your "foreground color" setting is. Make sure it is "white" Edit -> Options -> Colors ... This solved my problem with Particle Remover. Hope it helps! Peter
|
«
Return to ImageJ
|
1 view|%1 views
| Free forum by Nabble | Edit this page |

